

Lissa's Homemade Thin Mint Cookies
Wet Ingredients
2 sticks of Unsalted Butter
2 cups C&H Pure Cane Sugar
2 large Organic Eggs
2 Tbsp Peppermint Extract
Dry Ingredients
2 cups Organic All-Purpose Flour
1 cup Cocoa Powder
2 tsp Kosher Salt
Topping
2 packages of Chocolate Melt Light Cocoa Wafers
2 tablespoons Candy Melts EZ Thin
Things you will need: Cookie Cutters and Parchment Paper
The Ingredients

Thin Mint Recipe Rules/Things NOT to do:
* If you use a blender, use a slow or lower speed. Don't over blend the cookie dough or else the dough will not have the air to expand. After the cookie bakes, it will become rock hard (especially these thin mints). How I avoided this was that I kneaded the cookie dough by hand.
* Don't be afraid to get your hands dirty. Knead, roll over and press the thin mint dough.
* Use flour to keep the cookie dough from sticking to the cutting board, but not too much flour otherwise your cookie dough will become dry. Lightly dust with flour.
* When using a rolling pin to flatten the cookie dough, don't over work the cookie dough or else the cookie dough will become crumbly and you will have to dispose of it because you cannot piece it together.
* Don't try to correct the cookie dough. The dough will be delicately thin and will tear easily. Use the cookie cutter to move the cookie to the parchment paper and baking sheet. With the dough cut in the cookie cutter, position the cookie dough on the baking sheet and press the thin mint dough out of the cookie cutter with your finger.
* Don't try to speed up the cooling process by putting baked cookies in the refrigerator. They will harden to the consistency of dog biscuits. I learned this the hard way and had to throw away a whole batch of cookies.
* If making a chocolate coating, you MUST use EZ Thins chocolate thinner. It is made from Palm Oil, same as what they use to make lip balm. I tasted the EZ Thins and I completely gagged. It tasted gross. I did not want to put this on my cookies at all. After dipping a few cookies into chocolate and seeing that they were too thickly coated, I decided that I had no choice other than to use the dreaded EZ Thin. The EZ Thins were necessary. They thinned the chocolate so that the coating was even and smooth, and they also made the melted chocolate able to coat more cookies. I tasted cookies with chocolate and EZ Thins, and I could not taste the EZ thin at all. Don't be afraid to work with EZ Thin. Use it and it will take your cookies from bulky and blah to amazing light chocolate coating.
*After the chocolate coating is set, let the cookies set. Don't touch them or else you will leave finger prints in the cookies.
*Use a spatula. Don't lift the thin mint cookies. They are very thin. You might break or tear the cookie.
* In the first few hours the thin mints will be a little tough to the bite. This is normal. Over several hours of sitting the melted chocolate will saturate into the cookie and soften it. To ensure that the cookies have softened, it's better to let these thin mints sit for a few hours before you serve them to friends, family and guests.
*If at first you don't like these cookies, wait until the second day. By the second day, the melted chocolate will make the thin mint become chewy on the outside and crisp on the inside. You might have to wait a day for these cookies to taste perfect.
If you can handle all of my rules of baking thin mints, you may begin.
The first part of this recipe we make a basic sugar cookie. The easiest way to remember how to start to make a sugar cookie is just think of the number 2; two sticks of butter and two cups of C&H Pure Cane Sugar. I put these into a bowl and started to smash them and mix them with a fork, but after awhile, it just got to the point where the sugar and butter would mix easier if I kneaded them with my hands.
The first part of this recipe we make a basic sugar cookie. The easiest way to remember how to start to make a sugar cookie is just think of the number 2; two sticks of butter and two cups of C&H Pure Cane Sugar. I put these into a bowl and started to smash them and mix them with a fork, but after awhile, it just got to the point where the sugar and butter would mix easier if I kneaded them with my hands.

I kneaded the sugar and butter with my hands and this is what my result looked like. I got a thumbs up from Nicole. She was begging me to make these Homemade Thin Mints. She loves the Girl Scout version so we definitely needed some thin mints at our house.

The next step is two eggs. I used the brown organic eggs for this recipe.

This is my glorious organic brown egg that I'm going to crack. Organic is best.

Nicole will tap and twist to break the eggs.

Now we have our eggs.

We started to stir our mixture with a fork.

The Peppermint Extract was transparent against the spoon, but the essence of it was extremely strong. Peppermint is a very aromatic spice. We used two full Tablespoons in our cookie batter.

We used Watkins Peppermint Extract. You can find it at Wal-Mart and most grocery stores.

I added Kosher salt. Table salt is very different than Kosher salt. Kosher salt is a little more mild in flavor than table salt.

We stirred everything up with a fork and ended up with a consistency that was thick. It looked like mashed potatoes, but the consistency was thicker than mashed potatoes. If yours looks like this, you're doing it right.

Next is the flour. We used Organic All-Purpose Flour.

We used Hershey's 100% Unsweetened Cocoa. Nicole tasted this, and it wasn't good. I think she was hoping that this cocoa would taste like a chocolate candy bar. Well, it doesn't. The cookies have plenty of sugar, and will be plenty sweet without any extra sugar.

Here is the flour with the cocoa poured on top. These are the dry ingredients.

I stirred the flour and cocoa together with a fork.


After awhile of stirring, the cookie dough batter became easier to knead with my hands. Some people use a blender for cookies, but at this point I wouldn't. You don't want to over work your cookie dough or else it will become overly hard.

I cut my cookie dough in half. I planned to bake a batch of cookies today and the next back tomorrow. This is especially good if you have lots of kids around. They eat all the cookies until they are gone, and the next day you just make another batch.

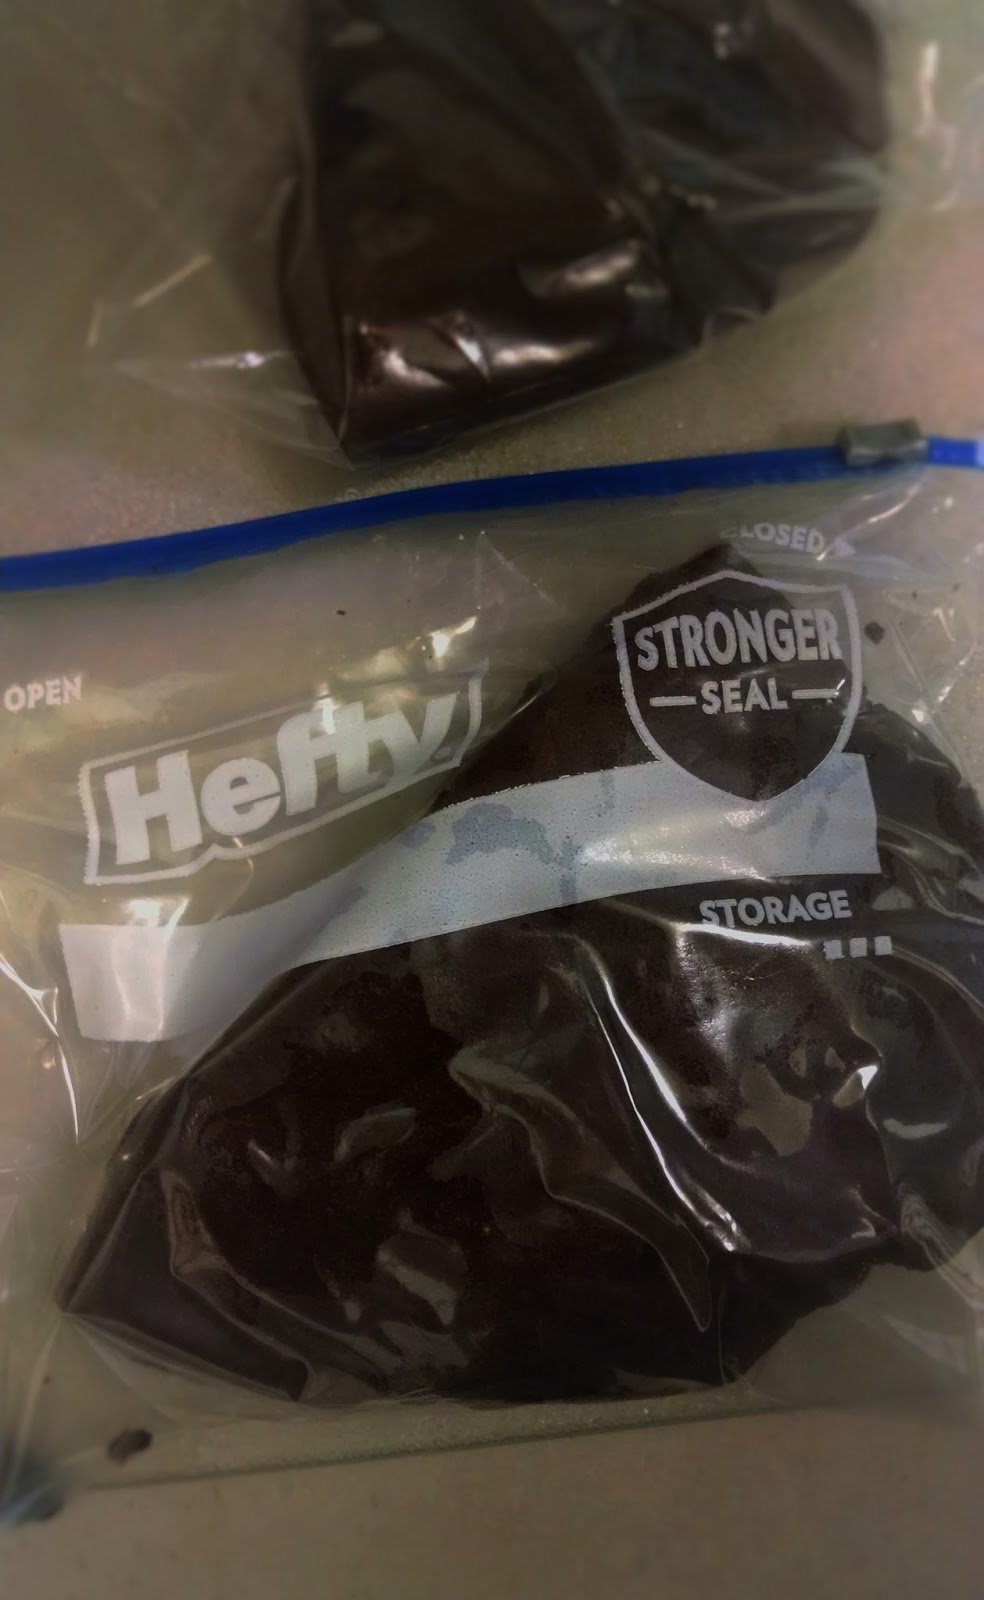
I put each bag into Hefty bags. You'll need to refrigerate these cookies for at least 1/2 hour. Put the cookie dough into the refrigerator and take a short break from all your hard work.
The next thing I want to set up is my parchment paper. I'm placing this over my cookie sheet. Parchment paper is important to work with because it is cleaner. If you use parchment paper, you don't have to use cooking spray, and it's easier to move the cookies without crumbling them. Thin mints are delicately slender and have a tenancy to crumble so parchment paper is essential to making good thin mint cookies.

I used scissors to cut the parchment paper.

This is nice and evenly placed over my cookie sheet. Now I have a place to put my cookies when I am cooking them.

After about an hour of cooling, I rolled out my cookie dough. My cookie dough did not roll out into a perfect circle. It was full of imperfections. This dough was a little hard to work with. I had to lightly dust with flour in order to keep the dough from sticking.

I decided I liked the star cookie cutter best. I cut out a star shaped cookie.

I set out half a dozen peppermint cookies ready to bake. Bake these at 350 F for 8-12 minutes.

My cookies took a full twelve minutes. As you can see they baked fairly thin. They turned out to be a little hard. I was worried that I might have over worked or over cooked the dough. If the cookies are a little crisp, that's alright. It's going to turn out fine in the end so don't worry about it or think that you ruined them. They are supposed to be this way so don't get discouraged.

The next step is to cover the peppermint cookies with chocolate. Mmmm...

I'm not a microwave type person, but I have to admit that I did use the microwave to warm the chocolate melt wafers. I put the brown chocolate on for 30 seconds in the microwave. They still were only half way melted. What I did was stirred the warm, heated chocolate with the room temperature chocolate, and as you can see, it all melted down to the consistency that I wanted, a liquid consistency.

I'm not a pastry chef so I don't typically work with EZ Thin. It looks like lip balm, smells like lip balm, and actually is made from palm oil, the same thing as everyday over the counter lip sticks. This EZ Thin tastes nasty. I dislike the flavor of EZ Thin. At first I did not want to use it, but after several trial and error experiments, there was no choice, but to use the EZ Thin. I was surprised at how it did not impact flavor and how easily the chocolate spread over the cookies. The EZ Thin looks like white flakes.

Here is a video of me dipping a chocolate star.
Here is another shape that we liked. Nicole liked the flower shape. These cookie cutters that we bought came from the Wilton collection, and can be found at Wal-Mart and any place that sells cake baking accessories. I believe that JoAnn's even has these.

These are some of our Homemade Thin Mint Cookie Stars. They turned out great.

The first day, these thin mint cookies tasted a little bit hard. I even considered throwing them away, but I was so tired, I set them aside instead. The second day, the thin mints became moist. These homemade thin mints were rich and sweet. The outside had a chewy chocolate and inside was crisp peppermint flavored cookie. Fresh is better. In my opinion homemade is much better than the Girl Scout Cookies. If I could do these differently, I would actually make these cookies smaller or would have used a shot glass for a cookie cutter to get smaller cookies. They are so rich that less is more. A smaller cookie bite is ideal.
These thin mints were a real piece of work trying to make. It was more trouble that I thought it would be. For all the time it took to make these, I think it was well worth it. Thank you for reading. We will have more recipes soon. Follow us and like us on Facebook. Subscribe by email in the top right corner, enter your email so you never miss a recipe. Follow us on Twitter. Add us to your Google Plus, and have a great day.
Love,
Lissa
No comments:
Post a Comment
Post a Comment