Popeye the Sailor Man was known for his muscles and eating spinach. Like Popeye, I love spinach too. I made this vegan spinach smoothie because I wanted something cool to drink this summer that is healthy. Spinach is a super food that tastes great and is loaded with all the right vitamins and minerals. Spinach has high levels of potassium and promotes healthy digestion. Spinach has more potassium than bananas. Spinach is loaded with calcium, magnesium, and iron. Spinach has calcium and is good for bone growth. The magnesium in spinach is great for your heart and immune system. Leafy greens like spinach help improve your complexion and give a person healthier skin and healthy looking hair. There are many perks to drinking this smoothie. The ingredients are very basic and easy to acquire so I encourage everyone to try this.
Lissa's Vegan Popeye Smoothie
Lissa's Vegan Popeye Smoothie
2 cups of Ice Cubes (about 24 ice cubes)
2 cups Spinach
1 large Banana
1/2 cup C&H Pure Cane Sugar
1 1/2 cup Unsweetened Coconut Milk
2 Tbs Organic Chai Seeds
1 tsp Vanilla Extract
The Ingredients
I added an entire ice tray full of ice to the bottom of the blender. Since I am using fresh fruits and fresh veggies instead of frozen ones, having a great deal of ice is necessary to make the smoothie a little thicker.
I added the coconut milk and a banana. Now I'm going to pour on the sugar.
I added vanilla extract and now I'm going to add the organic chai seeds. Chai seeds help thicken smoothies and give the smoothie more texture. I like chai seeds because they are high in nutrients and low in calories. Most of the carbohydrates in chai seeds contain fiber. Chai seeds are easy to add and they make a person feel full. Some people would say that feeling full might lead to weight loss, but it really doesn't. Chai seeds won't make anyone lose weight, but they will give a person more Omega-3 fatty acids that are healthy. If you would like to lose weight, it is necessary to burn more calories than you consume. When you do consume calories, it's important to have the right ones. Chai seeds are very good for you.
Organic Chai Seeds
This was the finished product on my Popeye smoothie. Sometimes I will get up in the morning, and I drink a cup of coffee or two, but I'm not really yet hungry for solid foods. I think if I eat too many solid foods to early in the morning it will be hard to digest. I like to start out with fluids in the morning. I usually like to have this around noon, and I will drink two to four little martini glasses of this. I will feel full for the rest of the day. I couldn't eat snacks or candy if I wanted to. There's just no room for junk food if you drink this first.
This recipe is perfect for a detox or a cleanse. One thing I like about green smoothies like this one is if you're having bad acne and you don't know what to do to keep your skin clear, these sort of drinks with anti-oxidants can help keep your skin looking radiant. Most of my friends that wear cover up for their skin always ask me how I keep my skin looking nice. I rarely ever wear cover up. I actually have combination skin to oily skin so it's more difficult for me to keep my complexion clear than it is for most people. I manage my complexion with a healthy diet, drinking plenty of water (no soda), and I wash my face once in the morning and once at night. It's harder to keep my complexion nice that time of the month because of the hormonal changes that happen. When there are changes in the body, it's important to maintain your chemical balance. My Popeye smoothie is really great at regulating that balance within your body.
My daughter did not want to drink this at first. She told me that she only likes Kale Green Smoothies, but I got her to try this. I told her that if she wanted to be a dancer, she needs to eat healthy foods that will give her the energy to dance. She had a sip and ran off with the cup. I found it empty so this recipe is definitely kid approved. Give this a try. I think you will like it.
When the weather is sunny it's the perfect time for a road trip. There's nothing like having good snacks prepared for a long journey. One snack that I recommend is our recipe for beef jerky. This recipe is superb in every way. There is a burst of flavor in every bite. This same recipe can be used to flavor tofu jerky, and so if you prefer vegan foods, there are alternatives to this recipe.
Lissa's Beef Jerky
Lissa's Beef Jerky
2 lbs Thinly Sliced Flank Steak (at Smith's)
1/2 cup Kikkoman Soy Sauce
1/2 cup Lea & Perrin's All Natural Worcester Sauce
3 Tbs Raw Honey (We bought local Cache Valley, Utah raw honey.)
1 Tbs Courvoisier Cognac
2 tsp Hickory Flavored Liquid Smoke
2 tsp Fresh Ground Pepper
2 tsp Kosher salt
Crushed Red Pepper to season (optional, and for the kids, I never put this on their beef jerky.)
The Ingredients
I started off with the Worcester sauce.
After that, it was time to add some Kikkoman Soy Sauce.
My sister bought us 100% Raw Cashe Valley, Utah Honey. She had ordered it online from Etsy.
One of my favorite French spirit is called Courvoisier Fine Cognac "The Cognac of Napoleon." I am an affectionado of Courvoisier because it is one of the finest Parisian cognacs ever made. It's flavor and affect is unmatched. Courvoisier was a favorite drink of Napoleon I, and a war ration to his French soldiers during the Napoleonic Wars. A taste of Courvoisier, and it might become your favorite too. This particular bottle came from Jarnac, France. It is reasonably priced compared to other brands of Courvoisier sold in the United States. I will use Courvoisier in this beef jerky recipe to increase the flavor.
Each person dries their beef jerky differently. Some people slow roast it over charbroil grill. Some people bake beef jerky in their oven. I used a meat dehydrator. My dehydrator has only two buttons on and off so there's really nothing to it. There are four racks that come apart. The beef jerky meat is loaded onto separate racks. I only used three of the four racks when I made beef jerky this time.
There are several different ways to cut the meat. One way is with the grain of the meat, and another way is against the grain of the meat. If you cut with the grain of meat, the beef jerky will be extra tough to chew, and some prefer this, but if you like to have beef jerky that is easier to chew cut against the grain of meat, and it will fall right apart. We debated what to do with our meat. The butcher gave us an extra long strip of flank steak. We decided to cut it into thirds. Two-thirds of the flank steak would be long strips of jerky, and the other one-third would be beef jerky bites. The portion on the right would be the jerky bites, and the portion on the left would be the jerky strips. After this vertical cut, everything else was cut with the grain. We will have to chew extra hard to enjoy this flavorful beef jerky.
In preparing the meat, many people will pre-freeze the meat so that it slices more thinly. My refrigerator gets quite cold, and I wanted the meat to be fresh, not frozen. I did NOT freeze this meat. It is fresh. I thought about it. I can handle thicker slices of meat, but I can't handle frozen meat. The other part of preparing meat is that if you have fat, it is important to trim it away. What fat does to your jerky is it fails to cure. Sure the fatty parts taste amazingly sweet when dehydrated into jerky, but they also rot quickly. So unless you're planning on eating your jerky in the next week or two, it's important to trim away the fat. Did I do it? Do you see much fat on this? No, the cut I had from the butcher was for the most part a nice clean fat free cut. Knowing this and knowing my own house, the way kids run in and out of my house, there's no way 2 lb. of beef jerky will last more than a few days so I left the fat on.
This is me chopping the beef with the grain. They aren't as thin as bacon, but they're still thin slices.
This is what the slices of beef jerky looked like when we first placed the meat in the marinade. I added the salt, pepper, and liquid smoke at this time.
How long do you marinade beef jerky? Is there a correct answer? Well, after about an hour in the refrigerator, the meat soaked up virtually all of the sauce. Most of the meat had turned brown, the same color as the sauce. I smelled the meat, and it smelled very much like the flavoring. Sure, I could have left it longer in the marinade, but I decided that I liked the way it smelled, and so I was ready to put the beef into the dehydrator.
Here are the jerky strips.
I placed the jerky strips that I wanted to be spicy jerky with red pepper flakes at the bottom rack to separate them. Once the strips were set on the rack, I placed the red pepper flakes on them. After that, I placed the next rack on top with the plain jerky with no red pepper flakes higher up so that the kid's beef jerky would not have any red pepper spice. I wanted the kid's beef jerky to taste more neutral, nothing too hot or spicy.
The red pepper jerky came out great. The nice thin strips were cut with the grain and came out chewy and flavorful. Each bite into this and your mouth will have an explosion of savory sweet and spicy beef flavors.
Beef Jerky with Red Pepper Flakes
The Kid's Beef Jerky
The kid's beef jerky had no red pepper flakes. I did not remove any of the fat. As I looked at it, the fat for some reason was located in the center of the meat. The only way I could cut out that particular slice of fat would be to cut the meat in half. All in all, this flank steak was mostly a great cut of beef. The jerky turned out wonderfully. I recommend that everyone try this.
My favorite Girl Scout cookie is Thin Mints. I have to admit, it is a lot of hard work to make. Each step has to be followed precisely or else you might find that these Homemade Thin Mint cookies become a cookie flop. I kept working at it all day by trial and error. Hopefully I have all of the cooking kinks knocked out before you try to make these at home. If you try to make Homemade Thin Mints, I recommend that you follow the recipe carefully. I usually don't write this about my recipes, but it you have trouble following a recipe or have a bad track record for burning things or blowing things up, maybe it's just cheaper and easier to buy a box of Girl Scout cookies. Thin mints require detailed care and can take some skill to master. When the Girl Scout cookies run out or are out of season, that's where this recipe comes becomes most useful. With this recipe, you can still have that savory chocolate covered Peppermint crisp year round.
Lissa's Homemade Thin Mint Cookies
Wet Ingredients
2 sticks of Unsalted Butter
2 cups C&H Pure Cane Sugar
2 large Organic Eggs
2 Tbsp Peppermint Extract
Dry Ingredients
2 cups Organic All-Purpose Flour
1 cup Cocoa Powder
2 tsp Kosher Salt
Topping
2 packages of Chocolate Melt Light Cocoa Wafers
2 tablespoons Candy Melts EZ Thin
Things you will need: Cookie Cutters and Parchment Paper
The Ingredients
Thin Mint Recipe Rules/Things NOT to do:
* If you use a blender, use a slow or lower speed. Don't over blend the cookie dough or else the dough will not have the air to expand. After the cookie bakes, it will become rock hard (especially these thin mints). How I avoided this was that I kneaded the cookie dough by hand.
* Don't be afraid to get your hands dirty. Knead, roll over and press the thin mint dough.
* Use flour to keep the cookie dough from sticking to the cutting board, but not too much flour otherwise your cookie dough will become dry. Lightly dust with flour.
* When using a rolling pin to flatten the cookie dough, don't over work the cookie dough or else the cookie dough will become crumbly and you will have to dispose of it because you cannot piece it together.
* Don't try to correct the cookie dough. The dough will be delicately thin and will tear easily. Use the cookie cutter to move the cookie to the parchment paper and baking sheet. With the dough cut in the cookie cutter, position the cookie dough on the baking sheet and press the thin mint dough out of the cookie cutter with your finger.
* Don't try to speed up the cooling process by putting baked cookies in the refrigerator. They will harden to the consistency of dog biscuits. I learned this the hard way and had to throw away a whole batch of cookies.
* If making a chocolate coating, you MUST use EZ Thins chocolate thinner. It is made from Palm Oil, same as what they use to make lip balm. I tasted the EZ Thins and I completely gagged. It tasted gross. I did not want to put this on my cookies at all. After dipping a few cookies into chocolate and seeing that they were too thickly coated, I decided that I had no choice other than to use the dreaded EZ Thin. The EZ Thins were necessary. They thinned the chocolate so that the coating was even and smooth, and they also made the melted chocolate able to coat more cookies. I tasted cookies with chocolate and EZ Thins, and I could not taste the EZ thin at all. Don't be afraid to work with EZ Thin. Use it and it will take your cookies from bulky and blah to amazing light chocolate coating.
*After the chocolate coating is set, let the cookies set. Don't touch them or else you will leave finger prints in the cookies.
*Use a spatula. Don't lift the thin mint cookies. They are very thin. You might break or tear the cookie.
* In the first few hours the thin mints will be a little tough to the bite. This is normal. Over several hours of sitting the melted chocolate will saturate into the cookie and soften it. To ensure that the cookies have softened, it's better to let these thin mints sit for a few hours before you serve them to friends, family and guests.
*If at first you don't like these cookies, wait until the second day. By the second day, the melted chocolate will make the thin mint become chewy on the outside and crisp on the inside. You might have to wait a day for these cookies to taste perfect.
If you can handle all of my rules of baking thin mints, you may begin.
The first part of this recipe we make a basic sugar cookie. The easiest way to remember how to start to make a sugar cookie is just think of the number 2; two sticks of butter and two cups of C&H Pure Cane Sugar. I put these into a bowl and started to smash them and mix them with a fork, but after awhile, it just got to the point where the sugar and butter would mix easier if I kneaded them with my hands.
I kneaded the sugar and butter with my hands and this is what my result looked like. I got a thumbs up from Nicole. She was begging me to make these Homemade Thin Mints. She loves the Girl Scout version so we definitely needed some thin mints at our house.
The next step is two eggs. I used the brown organic eggs for this recipe.
This is my glorious organic brown egg that I'm going to crack. Organic is best.
Nicole will tap and twist to break the eggs.
Now we have our eggs.
We started to stir our mixture with a fork.
The Peppermint Extract was transparent against the spoon, but the essence of it was extremely strong. Peppermint is a very aromatic spice. We used two full Tablespoons in our cookie batter.
We used Watkins Peppermint Extract. You can find it at Wal-Mart and most grocery stores.
I added Kosher salt. Table salt is very different than Kosher salt. Kosher salt is a little more mild in flavor than table salt.
We stirred everything up with a fork and ended up with a consistency that was thick. It looked like mashed potatoes, but the consistency was thicker than mashed potatoes. If yours looks like this, you're doing it right.
.
Next is the flour. We used Organic All-Purpose Flour.
We used Hershey's 100% Unsweetened Cocoa. Nicole tasted this, and it wasn't good. I think she was hoping that this cocoa would taste like a chocolate candy bar. Well, it doesn't. The cookies have plenty of sugar, and will be plenty sweet without any extra sugar.
Here is the flour with the cocoa poured on top. These are the dry ingredients.
I stirred the flour and cocoa together with a fork.
After the dry ingredients (flour and cocoa) are mixed together, they need to be added to the wet ingredients. We spooned them into the same bowl as the sugar, butter, egg and peppermint extract.
After awhile of stirring, the cookie dough batter became easier to knead with my hands. Some people use a blender for cookies, but at this point I wouldn't. You don't want to over work your cookie dough or else it will become overly hard.
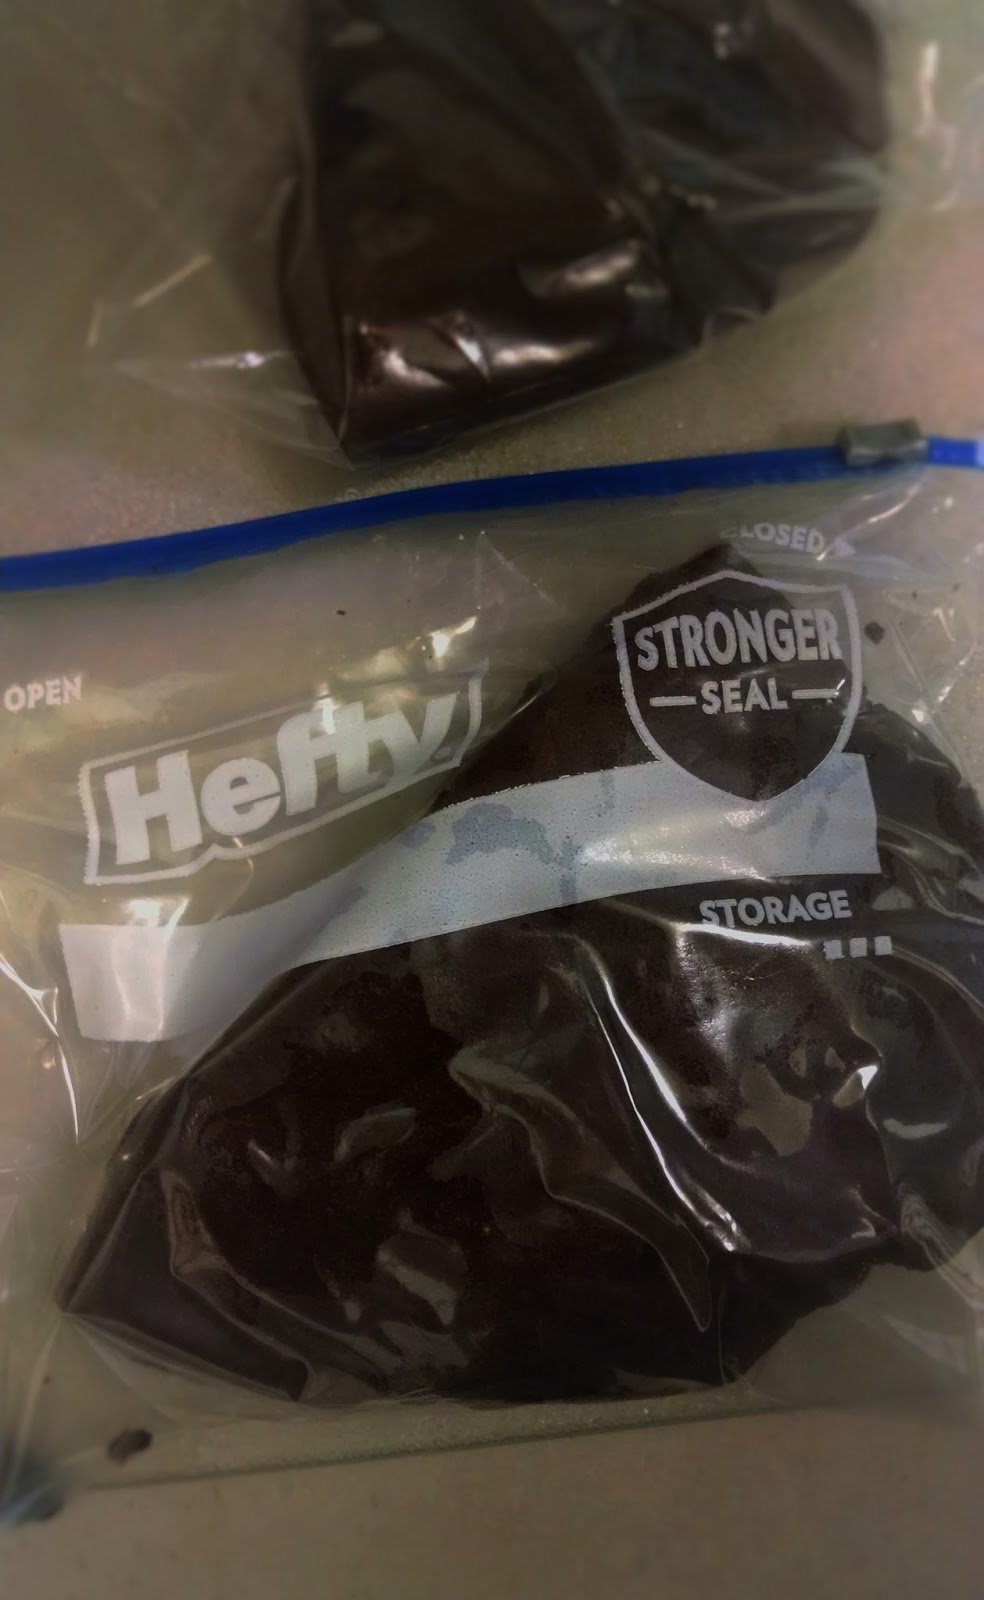
I cut my cookie dough in half. I planned to bake a batch of cookies today and the next back tomorrow. This is especially good if you have lots of kids around. They eat all the cookies until they are gone, and the next day you just make another batch.
I put each bag into Hefty bags. You'll need to refrigerate these cookies for at least 1/2 hour. Put the cookie dough into the refrigerator and take a short break from all your hard work.
The next thing I want to set up is my parchment paper. I'm placing this over my cookie sheet. Parchment paper is important to work with because it is cleaner. If you use parchment paper, you don't have to use cooking spray, and it's easier to move the cookies without crumbling them. Thin mints are delicately slender and have a tenancy to crumble so parchment paper is essential to making good thin mint cookies.
I used scissors to cut the parchment paper.
This is nice and evenly placed over my cookie sheet. Now I have a place to put my cookies when I am cooking them.
After about an hour of cooling, I rolled out my cookie dough. My cookie dough did not roll out into a perfect circle. It was full of imperfections. This dough was a little hard to work with. I had to lightly dust with flour in order to keep the dough from sticking.
I decided I liked the star cookie cutter best. I cut out a star shaped cookie.
I set out half a dozen peppermint cookies ready to bake. Bake these at 350 F for 8-12 minutes.
My cookies took a full twelve minutes. As you can see they baked fairly thin. They turned out to be a little hard. I was worried that I might have over worked or over cooked the dough. If the cookies are a little crisp, that's alright. It's going to turn out fine in the end so don't worry about it or think that you ruined them. They are supposed to be this way so don't get discouraged.
The next step is to cover the peppermint cookies with chocolate. Mmmm...
I'm not a microwave type person, but I have to admit that I did use the microwave to warm the chocolate melt wafers. I put the brown chocolate on for 30 seconds in the microwave. They still were only half way melted. What I did was stirred the warm, heated chocolate with the room temperature chocolate, and as you can see, it all melted down to the consistency that I wanted, a liquid consistency.
I'm not a pastry chef so I don't typically work with EZ Thin. It looks like lip balm, smells like lip balm, and actually is made from palm oil, the same thing as everyday over the counter lip sticks. This EZ Thin tastes nasty. I dislike the flavor of EZ Thin. At first I did not want to use it, but after several trial and error experiments, there was no choice, but to use the EZ Thin. I was surprised at how it did not impact flavor and how easily the chocolate spread over the cookies. The EZ Thin looks like white flakes.
Here is a video of me dipping a chocolate star.
Here is another shape that we liked. Nicole liked the flower shape. These cookie cutters that we bought came from the Wilton collection, and can be found at Wal-Mart and any place that sells cake baking accessories. I believe that JoAnn's even has these.
These are some of our Homemade Thin Mint Cookie Stars. They turned out great.
.
The first day, these thin mint cookies tasted a little bit hard. I even considered throwing them away, but I was so tired, I set them aside instead. The second day, the thin mints became moist. These homemade thin mints were rich and sweet. The outside had a chewy chocolate and inside was crisp peppermint flavored cookie. Fresh is better. In my opinion homemade is much better than the Girl Scout Cookies. If I could do these differently, I would actually make these cookies smaller or would have used a shot glass for a cookie cutter to get smaller cookies. They are so rich that less is more. A smaller cookie bite is ideal.
These thin mints were a real piece of work trying to make. It was more trouble that I thought it would be. For all the time it took to make these, I think it was well worth it. Thank you for reading. We will have more recipes soon. Follow us and like us on Facebook. Subscribe by email in the top right corner, enter your email so you never miss a recipe. Follow us on Twitter. Add us to your Google Plus, and have a great day.